Installing a reduced-thickness and mineral-filled shower tray requires special attention. If the process is not carried out correctly, it can lead to cracks in the product over time. For this reason, we tell you the steps to follow to install a shower tray properly, the materials to use and some advice that will be very useful to you.
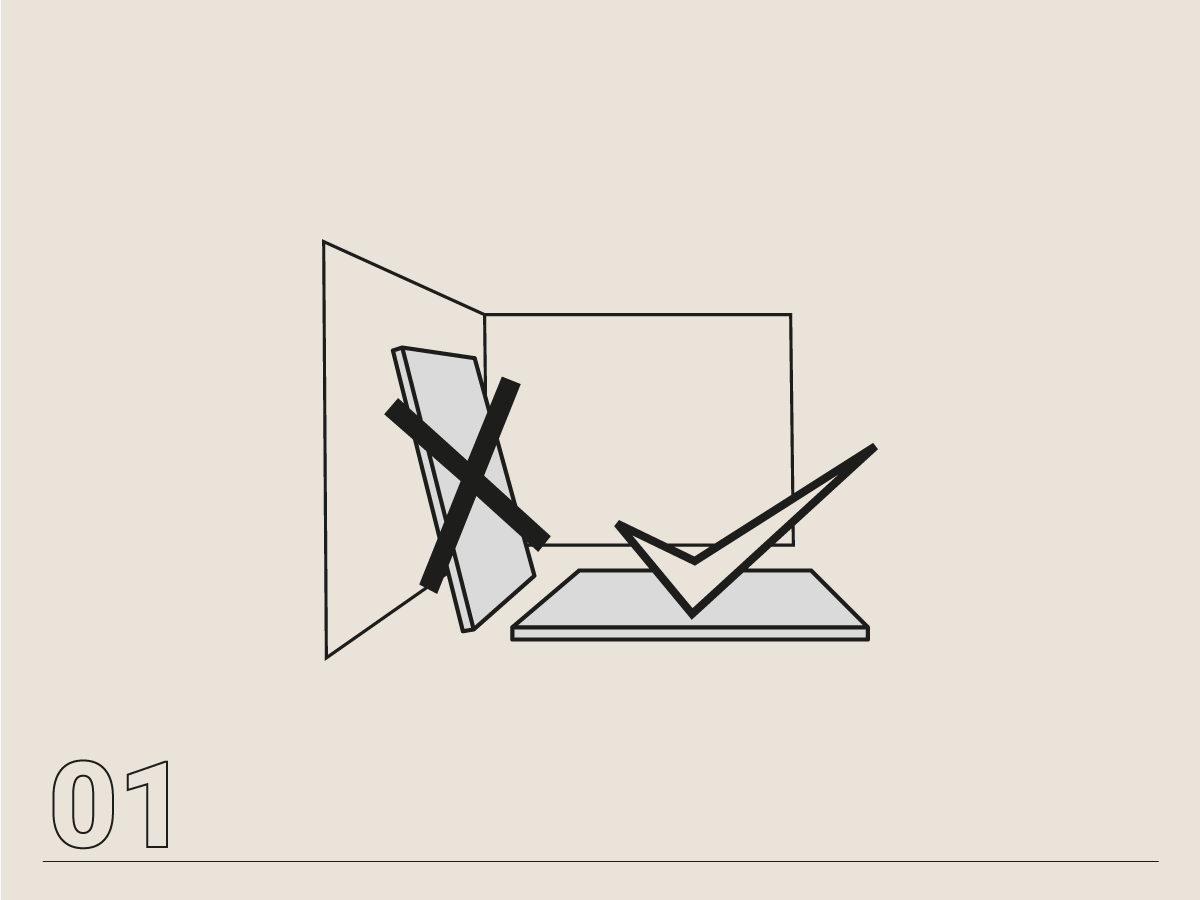
Review the product
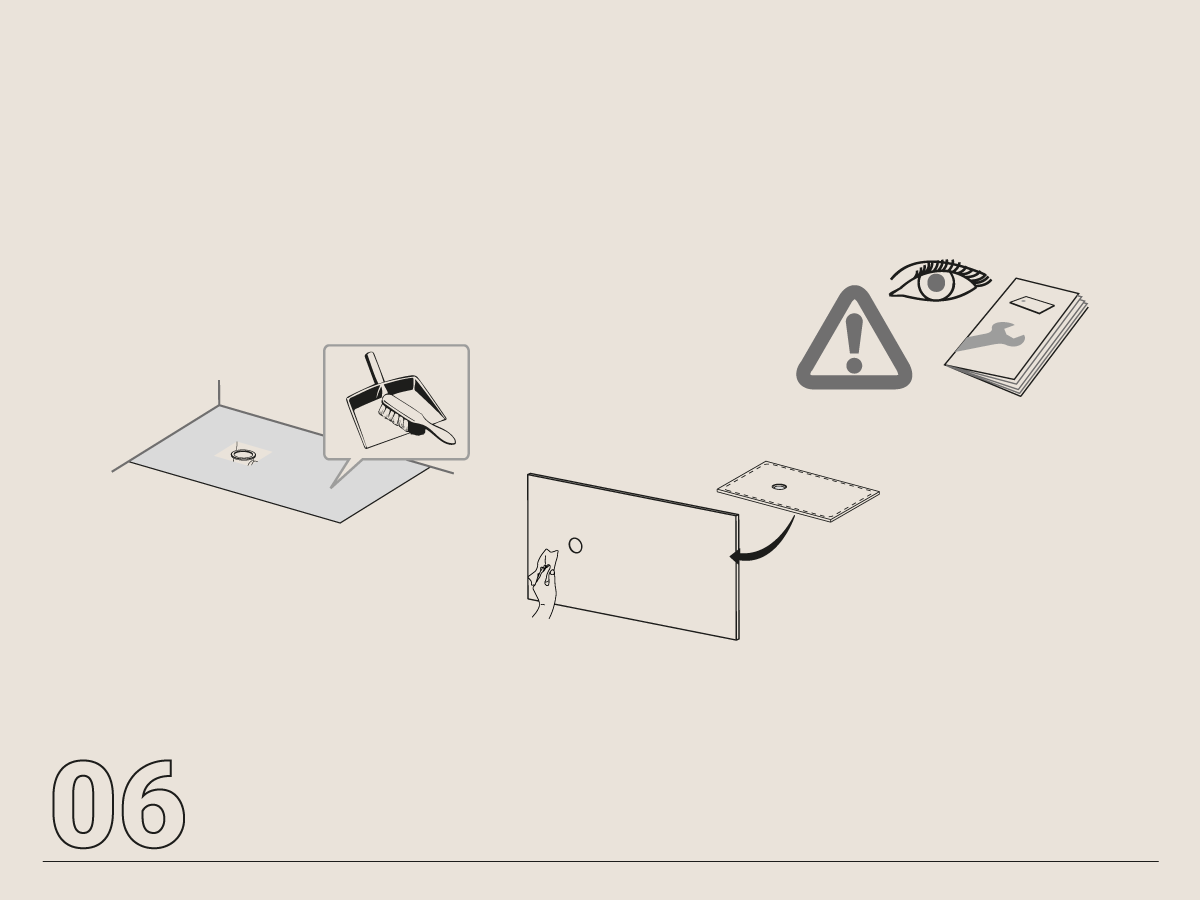
Before installing the shower tray, check that it is in perfect condition and and despite the fact that our shower trays have the slope made, it is good to locate it and verify that it goes from the ends to the valve.
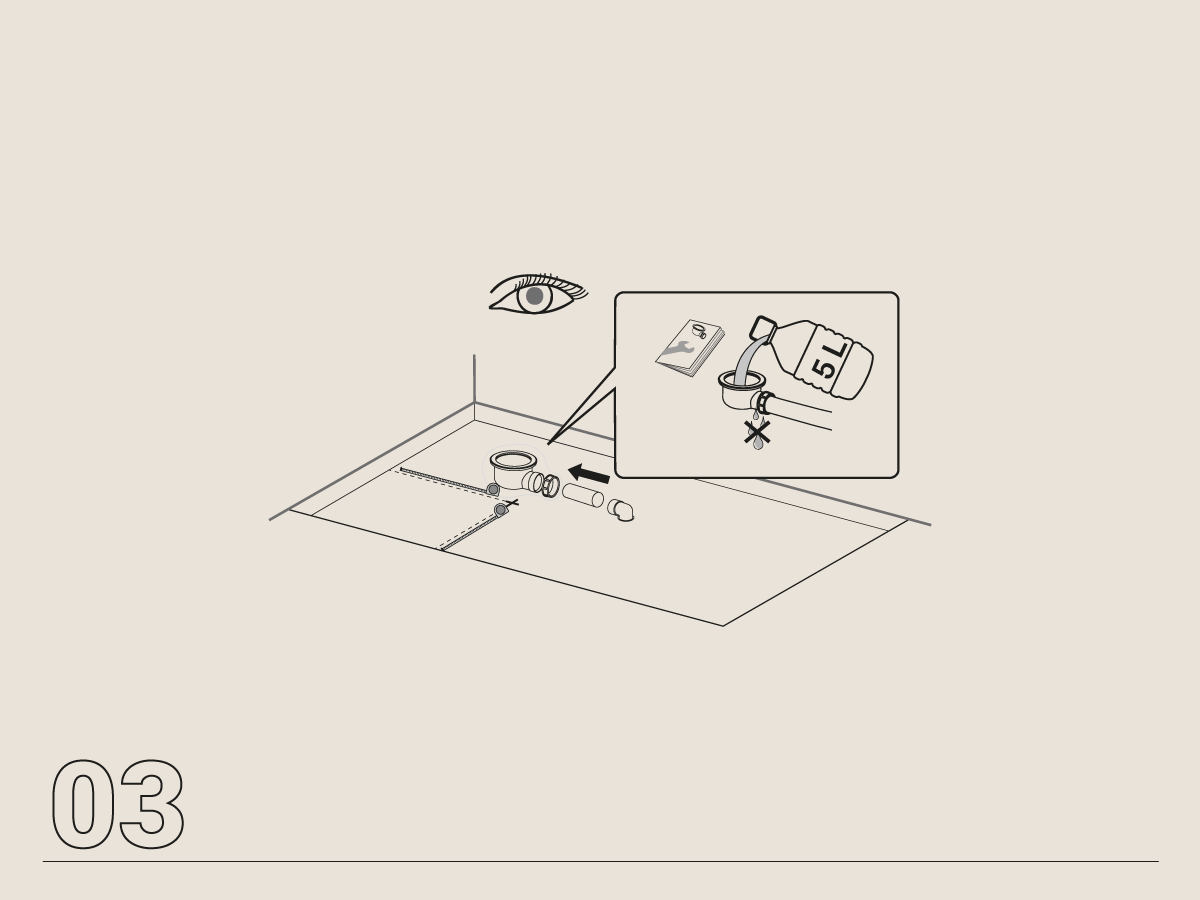
Select the valve and mark the area
The correct valve must be selected. To do this, the plumbing characteristics of the work must be taken into account (water flow through the taps, distance to the downspout…) and whether the shower tray is installed flush with the pavement or raised. In addition, it must be taken into account that in order to comply with the building code, they must have the EN274 marking.
Tip: For a correct installation of the valve, previously place the plate in the hole and mark the drainage area. If not, there may be problems centering it and installing the plumbing, which can lead to water leaks.
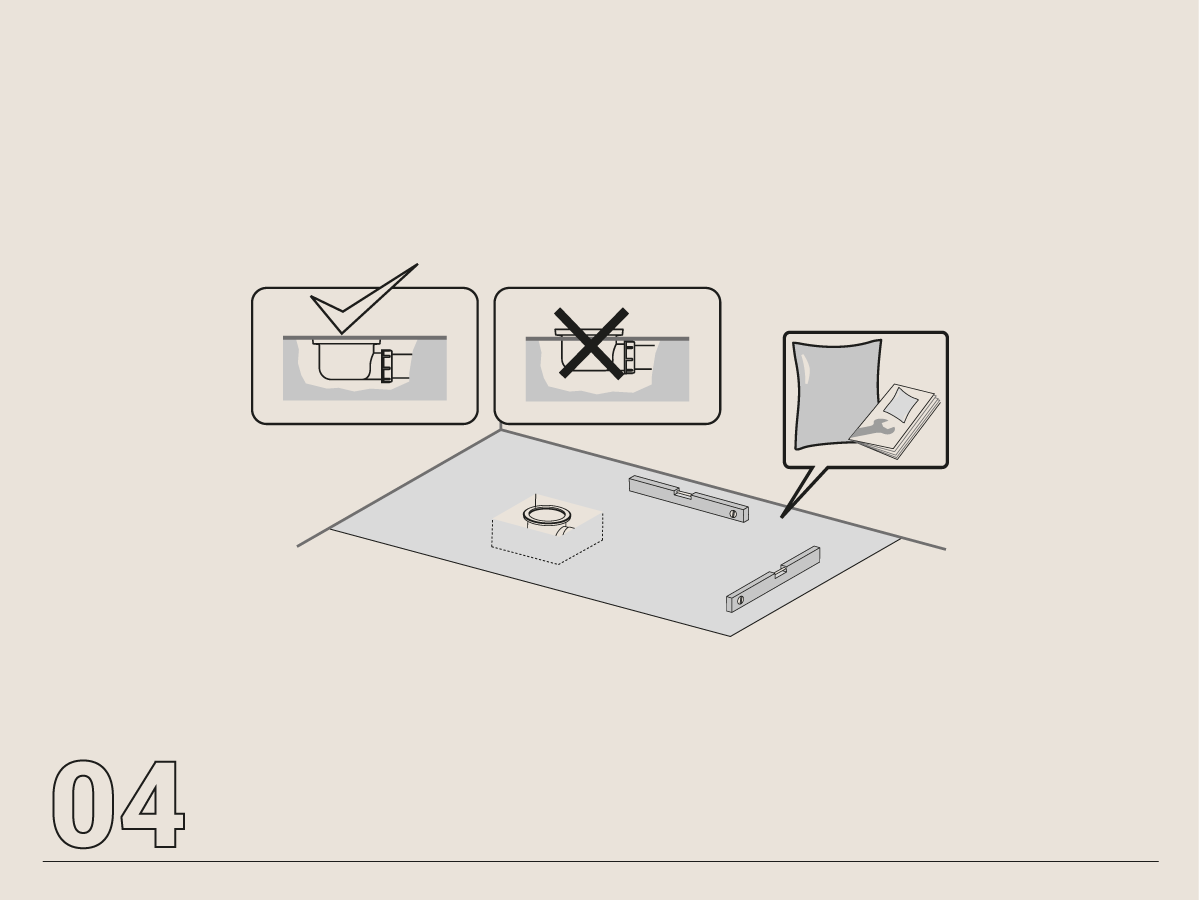
Prepare the installation área
The area that will serve as a support for the shower tray must be firm and level, since the shower tray will fully copy the base where it is installed. Once installed the possibilities of readjustment are minimal.
Place the shower tray
It is important to select a suitable adhesive. Shower trays are waterproof, non-porous products, to which cementitious-type adhesives (used for tile installation) do not adhere. The use of this type of adhesive can cause the product to bend, even leading to cracking.
Once the base is dry and level and the adhesive selected, the adhesive must be applied evenly below it and place the shower tray, leaving expansion joints with the adjoining elements. In case you don’t leave them you can generate tension in the shower tray due to high temperature changes and can become deformed.
To finish, it would only be necessary to check the leveling of the piece. At this time, the adhesive is still tender and the plate can still be removed.
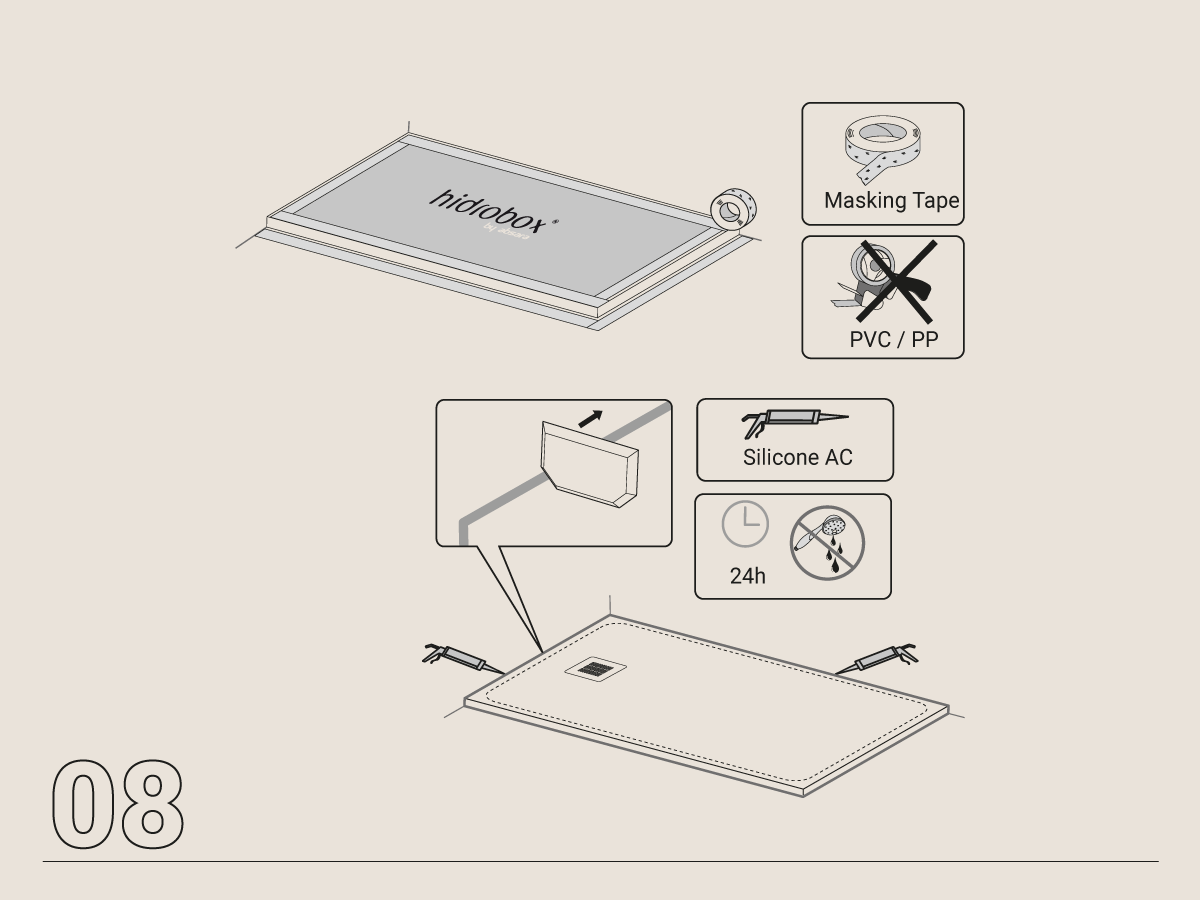
Tip: protect the shower tray during the entire gluing process and the subsequent tiling of the walls so that it is kept in perfect condition.

Seal the perimeter
Once the shower tray is installed, the joints must be sealed with a silicone cord so that there are no water leaks.

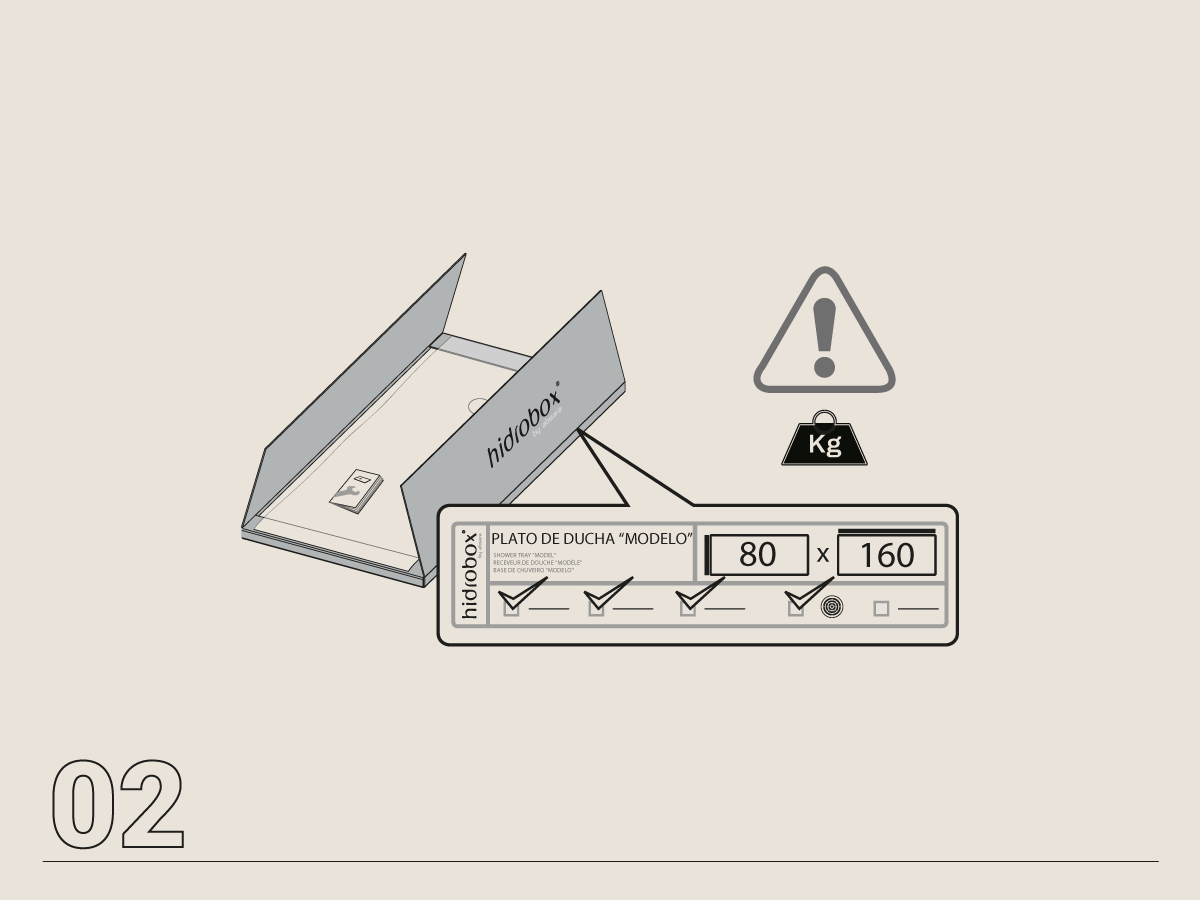
At Hidrobox, we accompany all our shower trays with a specific installation manual for each of them. In addition, we include the detailed information in an information sheet that, thanks to its location on the packaging, will be the first thing the installer encounters when unpacking the product.
Do not forget that for any information or clarification, the Hidrobox post-sale team is fully available to the customer postventa@absaraindustrial.com